
I have just migrated my blog from a wordpress site to Shopify.
(What I want to do)
I had a wordpress blog on X server
↓
I want to migrate my domain to blog on Shopify
In doing so, I also reconnected the domain I used for wordpress to Shopify, and I'll show you exactly how to do that, along with screenshots!
Our target readers are those who have already acquired a domain name from Name.com and wish to connect it to Shopify.
Setting up a redirect before transferring your domain
First, check the redirect settings before transferring the domain.
The Wordpress domain structure is different from the Shopify domain structure, so be sure to set up your redirects first.
We have also compiled instructions on how to set up redirects, so if you have not yet done so, please refer to this page.
https://ec-penguin.com/blogs/shopify/redirect-settings
Configure the domain name settings on the Name.com side
If you have completed the redirect settings, let's get started with the necessary settings on the Name.com side.
Log in to the administration page of Name.com → open the Domain Settings tab at the top.
Then, click on "DNS Settings/Transfer Settings" on the sidebar.

A list of domains will be displayed, so select the domain you wish to set up.
The screen will look like the one below, so click on "Use DNS record settings" at the bottom.

You will then see a field at the top where you can add A/AAAA/CNAME/MX/NS/TXT/SRV/DS/CAA records as shown below.

The records to be added are
- CNAME
- A
only.
Configure and add each as follows.
CNAME Settings

- Host name → Add www.
- TYPE→Specified as CNAME
- VALUE -> set to shops.myshopify.com. This is the same throughout Shopify.
A setting

- Host name -> blank
- TYPE→A
- VALUE→Set to 23.227.38.65. This is also common throughout Shopify.
This completes the setup on the Name.com side!
Configure domain connection settings on the Shopify side
Next, we will set up the domain connection on the Shopify side.
Go to Administration -> Online Store -> Domains and click on "Connect Existing Domain".

Then, enter the domain that you have just set up with Name.com.
If all goes well, you will be taken to a screen that looks something like "Connection Complete.

It may take a little time for the DNS settings to complete at Name.com, so you will not be able to connect immediately. I waited about 5 minutes before I was able to connect, including SSL.
I actually connected to the URL to which the domain connection was made.
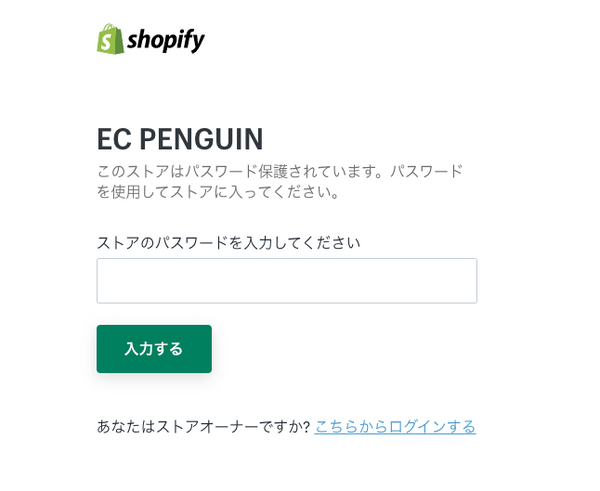
It's still a development store, so it comes with a password, but I can confirm that the domain connection to Shopify is working!
How to change the connection of your own domain purchased from Name.com from Wordpress to the Shopify store Conclusion
This is a summary of the domain transfer from the wordpress site to the Shopify site. Domain transfer can be quite complicated and there are a lot of words that I don't understand. There are a lot of redirects that need to be done. Sometimes it feels like a hassle.
However, it is very important to have your own domain name for your site, and using your own domain name instead of the myshopify.com URL that Shopify provides in advance will change the image of your Shopify store.
I hope you found this article helpful.
Have a great day!


![[React] Basics of React.](http://ec-penguin.com/cdn/shop/articles/flowers-7144466_1920_grande.jpg?v=1667560185)
![[Shopify] Send restock notifications for out-of-stock items with the Back In Stock app](http://ec-penguin.com/cdn/shop/articles/2022-03-01_23.20.43_grande.png?v=1646144465)
![[Deitra Shopify] For those who are unsure about taking the course. Content review and reputation [Experience]](http://ec-penguin.com/cdn/shop/articles/2022-02-22_20.23.34_grande.png?v=1645529038)
![How I taught myself [Shopify] and how I learned to become a Shopify engineer with no experience.](http://ec-penguin.com/cdn/shop/articles/love_and_joy_1_grande.png?v=1723885877)
![I would absolutely love to have this in my [Shopify] store! Recommended](http://ec-penguin.com/cdn/shop/articles/milky-way-6657951_1280_grande.jpg?v=1633862228)
![[Shopify App] Make classy landing page free with PageFly NoCode](http://ec-penguin.com/cdn/shop/articles/plant-5643271_1280_grande.jpg?v=1605355173)
![[Shopify] Essential background paper sheets for individual e-commerce site product photography [3 recommendations]](http://ec-penguin.com/cdn/shop/articles/2021-06-15_22.21.38_grande.png?v=1623763402)
![[Shopify]Make Valentines Day LP (Landing page) free with nocode](http://ec-penguin.com/cdn/shop/articles/rose-3063283_1280_grande.jpg?v=1631631509)